导出
下载
Exporter::download方法可以通过浏览器下载导出的文件,该方法会根据文件名后缀自动判断导出的文件类型。
use Dcat\EasyExcel\Excel;

$array = [
    ['id' => 1, 'name' => 'Brakus', 'email' => 'treutel@eg.com', 'created_at' => '...'],
    ...
];

// 导出xlsx类型文件
Excel::export($array)->download('users.xlsx');
Excel::xlsx($array)->download('users.xlsx');

// 导出csv类型文件
Excel::export($array)->download('users.csv');
Excel::csv($array)->download('users.csv');

// 导出ods类型文件
Excel::export($array)->download('users.ods');
Excel::ods($array)->download('users.ods');
保存文件
Exporter::store方法可以保存导出的文件到服务器,该方法会根据文件名后缀自动判断导出的文件类型。
use Dcat\EasyExcel\Excel;

$array = [
    ['id' => 1, 'name' => 'Brakus', 'email' => 'treutel@eg.com', 'created_at' => '...'],
    ...
];

// 导出xlsx类型文件
Excel::export($array)->store('users.xlsx');
Excel::xlsx($array)->store('users.xlsx');

// 导出csv类型文件
Excel::export($array)->store('users.csv');
Excel::csv($array)->store('users.csv');

// 导出ods类型文件
Excel::export($array)->store('users.ods');
Excel::ods($array)->store('users.ods');
Filesystem
Easy Excel 对 league/flysystem 提供了支持,通过 Filesystem 可以轻松的把文件保存到任意服务器,比如阿里云OSS。
这里只为演示用法,如需保存到第三方云存储服务器,则找到相应的adapter实现包即可。
use Dcat\EasyExcel\Excel;
use League\Flysystem\Adapter\Local;
use League\Flysystem\Filesystem;

$array = [...];

$adapter = new Local(__DIR__);

$filesystem = new Filesystem($adapter);

Excel::export($array)->disk($filesystem)->store('users.xlsx');
在Laravel中使用Filesystem
Easy Excel 对 Laravel 的 Filesystem 也提供了支持:
打开 config/filesystems.php 中找到如下配置:
return [
    ...

    'disks' => [

        'local' => [
            'driver' => 'local',
            'root' => storage_path('app'),
        ],

        ...

    ],
];
使用:
use Dcat\EasyExcel\Excel;

$array = [...];

// local 对应配置参数 config('filesystems.disks.local')
Excel::export($array)->disk('local')->store('users.xlsx');

// 也可以
Excel::export($array)->disk(Storage::disk('local'))->store('users.xlsx');
获取文件内容
Exporter::raw方法可以获取导出的文件的内容。
use Dcat\EasyExcel\Excel;

$array = [
    ['id' => 1, 'name' => 'Brakus', 'email' => 'treutel@eg.com', 'created_at' => '...'],
    ...
];

// 导出xlsx类型文件
$xlsxContents = Excel::export($array)->xlsx()->raw();
$xlsxContents = Excel::xlsx($array)->raw();

// 导出csv类型文件
$csvContents = Excel::export($array)->csv()->raw();
$csvContents = Excel::csv($array)->raw();

// 导出ods类型文件
$odsContents = Excel::export($array)->ods()->raw();
$odsContents = Excel::ods($array)->raw();
设置导出数据
Easy Excel 提供了多种实用的设置导出数据的接口。
数组
use Dcat\EasyExcel\Excel;

$array = [
    ['id' => 1, 'name' => 'Brakus', 'email' => 'treutel@eg.com', 'created_at' => '...'],
    ...
];

$exporter = Excel::export($array);
如果传入的参数是带有 toArray 方法的对象也是可以的
use Dcat\EasyExcel\Excel;
use Dcat\EasyExcel\Support\SheetCollection;

$collection = new SheetCollection([
     ['id' => 1, 'name' => 'Brakus', 'email' => 'treutel@eg.com', 'created_at' => '...'],
     ...
 ]);

$exporter = Excel::export($collection);
分块获取
Easy Excel 支持分块获取并导出数据,当导出的数据比较多时这个功能非常实用。
{tip} 此功能的实现原理是使用while循环获取匿名函数返回的值,如果匿名函数返回的结果不为空则循环会一直进行下去,所以需要注意不能让匿名函数的返回值一直不为空。
use Dcat\EasyExcel\Excel;
use App\User;

Excel::export()
    ->chunk(function (int $times) { // $times 表示循环次数,从1开始,可以当做查询页数实用
        // 每次获取1000条数据导入
        $chunkSize = 1000;

        // 只查询前10页数据
        if ($times > 10) {
            return;
        }

        // 当数据库查不到值时会停止执行闭包内的逻辑
        return User::query()->forPage($times, $chunkSize)->get();
    })
    ->download('users.xlsx');
生成器
use Dcat\EasyExcel\Excel;

// 这里纯粹是为了演示功能,这段代码没有实际意义
$generatorFactory = function () {
    $array = [
        ['id' => 1, 'name' => 'Brakus', 'email' => 'treutel@eg.com', 'created_at' => '...'],
        ...
    ];

    foreach ($array as $value) {
        yield $value;
    }
};

$exporter = Excel::export($generatorFactory());
在Laravel中可以使用 Eloquent::cursor
use Dcat\EasyExcel\Excel;
use App\User;

$exporter = Excel::export(User::query()->cursor()->getIterator());
匿名函数
在匿名函数中可以返回数组、对象(toArray)和生成器。
use Dcat\EasyExcel\Excel;
use Dcat\EasyExcel\Support\SheetCollection;

$exporter = Excel::export(function () {
    return new SheetCollection([
         ['id' => 1, 'name' => 'Brakus', 'email' => 'treutel@eg.com', 'created_at' => '...'],
         ...
    ]);
});
导出数据到多个表格
{tip} 此功能只支持导出
xlsx和ods类型文件,如果是csv只能导出到一个sheet表格。
简单方式
数组
use Dcat\EasyExcel\Excel;

$sheetArray1 = [
    ['id' => 1, 'name' => 'Brakus', 'email' => 'treutel@eg.com', 'created_at' => '...'],
    ...
];
$sheetArray2 = [...];

$sheets = [
    'sheet名称1' => $sheetArray1,
    'sheet名称2' => $sheetArray2,
    ...
];

Excel::export($sheets)->store('users.xlsx');
分块
use Dcat\EasyExcel\Excel;
use App\User;

$sheets = [
    'sheet名称1' => function (int $times) {
        if ($times > 10) {
            return;
        }

        // 查询前10页数据
        return User::query()->forPage($times, 1000)->get();
    },
    'sheet名称2' => function (int $times) {
        $times += 10;

        // 查询10页之后的数据
        return User::query()->forPage($times, 1000)->get();
    },
    ...
];

Excel::export()->chunk($sheets)->store('users.xlsx');
生成器
use Dcat\EasyExcel\Excel;
use App\User;

$sheets = [
    'sheet名称1' => User::query()->forPage(1, 1000)->cursor()->getIterator(),
    'sheet名称2' => User::query()->forPage(2, 1000)->cursor()->getIterator(),
    ...
];

Excel::export($sheets)->store('users.xlsx');
匿名函数
use Dcat\EasyExcel\Excel;
use App\User;

// 匿名函数可以返回纯数组、对象或生成器
$sheets = function () {
    return [
        'sheet名称1' => User::query()->forPage(1, 1000)->cursor()->getIterator(),
        'sheet名称2' => User::query()->forPage(2, 1000)->cursor()->getIterator(),
        ...
    ];
};

Excel::export($sheets)->store('users.xlsx')
Sheet对象
{tip} 使用
Sheet对象设置导入的值,可以控制每个表格都拥有不同的标题、标题样式以及行样式。
简单示例:
use Dcat\EasyExcel\Excel;
use App\User;

$sheet = Excel::createSheet(User::query()->forPage(1, 50)->get(), 'sheet名称1');

// 单个sheet
Excel::export($sheet)->download('users.xlsx');

// 多个sheet
$sheet1 = Excel::createSheet(User::query()->forPage(1, 50)->get(), 'sheet名称1');
$sheet2 = Excel::createSheet(User::query()->forPage(2, 50)->get(), 'sheet名称2');

Excel::export([$sheet1, $sheet2])->download('users.xlsx');同样Sheet对象也支持传入生成器和分批读取数据导入等功能。
use Dcat\EasyExcel\Excel;
use App\User;

$sheet = Excel::createSheet()->name('sheet名称1')->chunk(function (int $times) {
    return User::query()->forPage($times, 1000)->get();
});

// 单个sheet
Excel::export($sheet)->download('users.xlsx');
设置标题
Exporter::headings 方法可以直接设置要导出的文件的标题,并且可以根据标题控制列的排序。
use Dcat\EasyExcel\Excel;

$array = [
    ['id' => 1, 'name' => 'Brakus', 'email' => 'treutel@eg.com', 'created_at' => '...'],
    ...
];

// 设置标题,丢弃created_at字段,并更改列的先后顺序,
$headings = [
    'id'    => 'ID',
    'email' => '邮箱',
    'name'  => '名称',
];

// 最后导出的列只有 id、email、name
Excel::export($array)->headings($headings)->download('users.xlsx');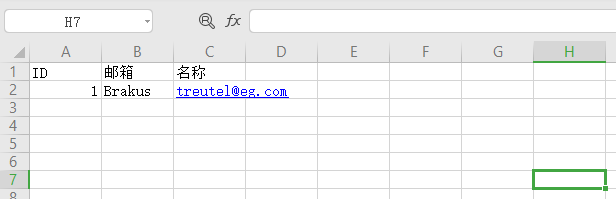
禁用标题行
如果不想导出的文件中带有标题行,可以通过以下方式禁用标题行。
use Dcat\EasyExcel\Excel;
$array = [
['id' => 1, 'name' => 'Brakus', 'email' => 'treutel@eg.com', 'created_at' => '...'],
...
];
// 传入 false 即可
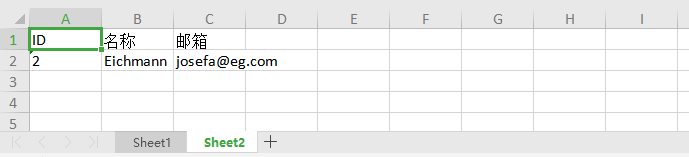
Excel::export($array)->headings(false)->download('users.xlsx');如果注入的 Sheet 对象中设置了标题,则通过 Exporter::headings 方法禁用标题功能会无效。
use Dcat\EasyExcel\Excel;

$array1 = [
    ['id' => 1, 'name' => 'Brakus', 'email' => 'treutel@eg.com', 'created_at' => '2019-10-19 00:37:22'],
];
$array2 = [
    ['id' => 2, 'name' => 'Eichmann', 'email' => 'josefa@eg.com', 'created_at' => '2019-10-19 00:37:22'],
];

$headings = ['id' => 'ID', 'name' => '名称', 'email' => '邮箱'];

$sheet1 = Excel::createSheet($array1);
$sheet2 = Excel::createSheet($array2)->headings($headings);

Excel::export([$sheet1, $sheet2])->headings(false)->download('users.xlsx');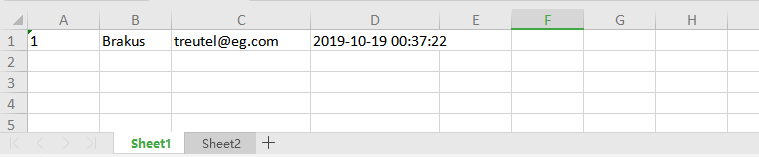
标题样式
{tip} 关于Excel表格的样式定义可以参考文档 box/spout。
use Box\Spout\Writer\Common\Creator\Style\StyleBuilder;
use Box\Spout\Common\Entity\Style\Color;
use Dcat\EasyExcel\Excel;

$array = [
    ['id' => 1, 'name' => 'Brakus', 'email' => 'treutel@eg.com', 'created_at' => '...'],
];

Excel::export($array)
    ->headings(function () {
        $headings = [
            'id'    => 'ID',
            'email' => '邮箱',
            'name'  => '名称',
        ];

        // 定义样式
        $style = (new StyleBuilder())
           ->setFontBold()
           ->setFontSize(15)
           ->setFontColor(Color::BLUE)
           ->setShouldWrapText()
           ->setBackgroundColor(Color::YELLOW)
           ->build();

        return [$headings, $style];
    })
    ->download('users.xlsx');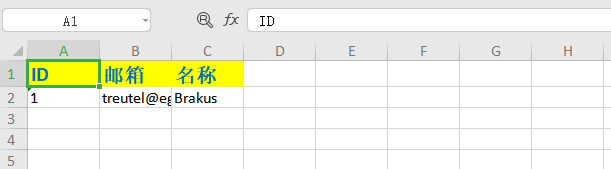
给每个表格设置不同的标题
use Dcat\EasyExcel\Excel;
use App\User;

// 创建多个sheet,并设置不同的标题
$user1  = User::query()->forPage(1, 50)->get();
$sheet1 = Excel::createSheet($user1, 'sheet名称1')->headings([...]);

$user2  = User::query()->forPage(2, 50)->get();
$sheet2 = Excel::createSheet($user2, 'sheet名称2')->headings([...]);

Excel::export([$sheet1, $sheet2])->download('users.xlsx');
给每个表格的标题设置不同的样式
use Dcat\EasyExcel\Excel;
use Box\Spout\Writer\Common\Creator\Style\StyleBuilder;
use Box\Spout\Common\Entity\Style\Color;

$array1 = [
    ['id' => 1, 'name' => 'Brakus', 'email' => 'treutel@eg.com', 'created_at' => '2019-10-19 00:37:22'],
];
$array2 = [
    ['id' => 2, 'name' => 'Eichmann', 'email' => 'josefa@eg.com', 'created_at' => '2019-10-19 00:37:22'],
];

$sheet1 = Excel::createSheet($array1)->headingStyle(
    (new StyleBuilder)
        ->setFontColor(Color::BLUE)
        ->setFontSize(14)
        ->build()
);
$sheet2 = Excel::createSheet($array2)->headingStyle(
     (new StyleBuilder)
         ->setFontColor(Color::RED)
         ->setFontSize(16)
         ->build()
 );

Excel::export([$sheet1, $sheet2])->download('users.xlsx');
设置内容样式
{tip} 关于Excel表格的样式定义可以参考文档 box/spout。
设置行样式
use Box\Spout\Writer\Common\Creator\WriterEntityFactory;
use Box\Spout\Writer\Common\Creator\Style\StyleBuilder;
use Box\Spout\Common\Entity\Style\Color;
use Dcat\EasyExcel\Excel;

$array = [
    ['id' => 1, 'name' => 'Brakus', 'email' => 'treutel@eg.com', 'created_at' => '2019-10-19 00:37:22'],
    ['id' => 2, 'name' => 'Eichmann', 'email' => 'josefa@eg.com', 'created_at' => '2019-10-19 00:37:22'],
];

Excel::export($array)
    ->row(function (array $row) {
        // 直接返回原数组,什么也不改变
        if ($row['id'] > 1) {
            return $row;
        }

        // 设置样式
        $style = (new StyleBuilder())
            ->setFontSize(13)
            ->setFontColor(Color::LIGHT_BLUE)
            ->setShouldWrapText()
            ->build();

        return WriterEntityFactory::createRowFromArray($row, $style);
    })
    ->download('users.xlsx');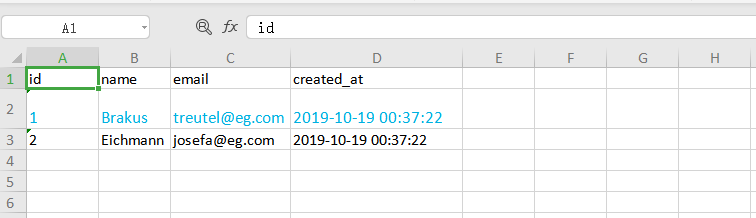
设置默认样式
use Box\Spout\Writer\Common\Creator\Style\StyleBuilder;
use Box\Spout\Common\Entity\Style\Color;
use Dcat\EasyExcel\Excel;

$array = [
    ['id' => 1, 'name' => 'Brakus', 'email' => 'treutel@eg.com', 'created_at' => '2019-10-19 00:37:22'],
    ...
];

Excel::export($array)
    ->option(function ($writer) {
        // 设置样式
        $style = (new StyleBuilder())
            ->setFontSize(13)
            ->setFontColor(Color::LIGHT_BLUE)
            ->setShouldWrapText()
            ->build();

        $writer->setDefaultRowStyle($style);
    })
    ->download('users.xlsx');
给每个表格行内容设置不同的样式
use Dcat\EasyExcel\Excel;
use Box\Spout\Writer\Common\Creator\Style\StyleBuilder;
use Box\Spout\Common\Entity\Style\Color;
use Box\Spout\Writer\Common\Creator\WriterEntityFactory;

$array1 = [
    ['id' => 1, 'name' => 'Brakus', 'email' => 'treutel@eg.com', 'created_at' => '2019-10-19 00:37:22'],
];
$array2 = [
    ['id' => 2, 'name' => 'Eichmann', 'email' => 'josefa@eg.com', 'created_at' => '2019-10-19 00:37:22'],
];

$sheet1 = Excel::createSheet($array1)->row(function (array $row) {
    $style = (new StyleBuilder)
         ->setFontColor(Color::BLUE)
         ->setFontSize(14)
         ->build();

    return WriterEntityFactory::createRowFromArray($row, $style);
});
$sheet2 = Excel::createSheet($array2)->row(function (array $row) {
    $style = (new StyleBuilder)
         ->setFontColor(Color::RED)
         ->setFontSize(16)
         ->build();

    return WriterEntityFactory::createRowFromArray($row, $style);
});

Excel::export([$sheet1, $sheet2])->download('users.xlsx');